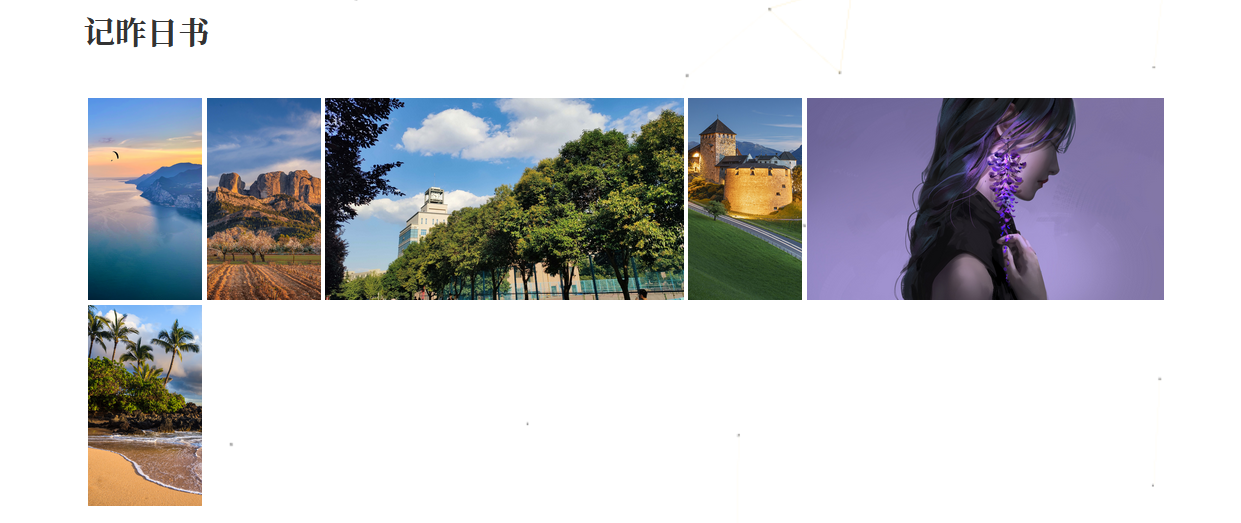
maupassant主题默认不支持相册功能,本文通过参考Ocean主题的相册实现方案,基于justifiedGallery插件为Maupassant主题添加响应式相册功能,并支持灯箱效果浏览。
一、前提知识
1.1 justifiedGallery
justifiedGallery是一个基于jQuery的响应式图片画廊插件,能够在不裁剪图片的前提下,通过动态算法将不同宽高比的缩略图“整齐地”填充到每一行,使整行高度保持一致。
- justifiedGallery 官方用法:
1
2
3
4
5
6
7
8
9
10
11
12
13
| <link rel="stylesheet" href="css/justifiedGallery.css" />
<script src="js/jquery.justifiedGallery.js"></script>
<div id="mygallery" >
<a href="path/to/myimage1_original.jpg">
<img alt="Title 1" src="path/to/myimage1_thumbnail.jpg"/>
</a>
<a href="path/to/myimage2_original.jpg">
<img alt="Title 2" src="path/to/myimage2_thumbnail.jpg"/>
</a>
</div>
|
1
| $("#mygallery").justifiedGallery();
|
1.2 模板引擎
- Hexo 使用模板引擎(如 EJS、Swig、Nunjucks、Pug 等)来渲染页面。
- 用户编写的 Markdown 文章和主题中的模板文件(如 .ejs)结合,通过 Hexo 的渲染流程,最终生成静态 HTML 文件。
- 主题开发者定义页面结构(如文章列表、单页、归档页等),并使用模板语法插入动态数据(如文章标题、内容、标签等)。
1.3 渲染流程:
- Hexo 读取 source/ 目录下的 Markdown 文件和 themes// 目录下的模板。
- 根据 _config.yml 中的配置(如 permalink),将数据注入到对应的模板中。
- 最终通过模板引擎生成 HTML 文件,并输出到 public/ 目录。
1.4 主题结构
1
2
3
4
5
6
7
8
9
10
11
12
13
14
15
16
17
18
19
| themes/<your-theme>/
├── _config.yml
├── languages/
├── layout/
│ ├── index.pug
│ ├── post.pug
│ ├── page.pug
│ ├── archive.pug
│ └── _widget/
│ └── donate.pug
│ └── tag.pug
│ └── _partial/
│ ├── header.pug
│ └── footer.pug
├── source/
│ ├── css/
│ ├── js/
│ └── images/
└── README.md
|
二、增加对应功能文件
2.1 添加画廊渲染模板
当页面包含相册数据时,layout/_partial/justifiedGallery.pug会生成对应的HTML结构来展示图片画廊。
1
2
3
4
5
6
7
8
9
10
11
| if theme.albums && page.albums && page.albums.length
.justified-gallery#gallery
each photo in page.albums
div
a(
href!= url_for(photo[0])
)
img(
src!= url_for(photo[1])
alt!= photo[2]
)
|
同时需要支持灯箱fancybox效果浏览,调整为:
1
2
3
4
5
6
7
8
9
10
11
12
13
14
15
16
| if theme.albums && page.albums && page.albums.length
.justified-gallery#gallery
each photo in page.albums
div
a.fancybox(
data-fancybox="images"
data-caption!= photo[2]
href!= url_for(photo[0])
rel="gallery_#{page._id}"
title!= photo[2]
)
img(
src!= url_for(photo[1])
itemprop="image"
alt!= photo[2]
)
|
在新增对应的画廊控制js代码 source/js/maupassant.js中:
1
2
3
4
5
6
7
8
9
10
|
$('#gallery').justifiedGallery({
rowHeight: 136,
margins: 3,
});
$("img.lazy").lazyload({
effect: "fadeIn"
})
|
添加样式文件source/css/style.css中添加样式:
1
2
3
4
5
6
7
8
9
10
11
12
13
14
15
16
17
18
19
20
21
22
23
24
25
26
27
28
29
30
31
32
33
34
35
36
37
38
39
40
41
42
43
44
45
46
47
48
49
50
51
52
53
54
55
56
57
58
59
60
61
62
63
64
65
66
67
68
69
70
71
72
73
74
75
76
77
78
79
80
81
82
83
84
| .justified-gallery {
width: 100%;
position: relative;
overflow: hidden;
> a, > div, > figure {
position: absolute;
display: inline-block;
overflow: hidden;
background: gray;
filter: alpha(opacity=10);
opacity: 0.1;
margin: 0;
padding: 0;
> img, > a > img, > svg, > a > svg {
position: absolute;
top: 50%;
left: 50%;
margin: 0;
padding: 0;
border: none;
filter: alpha(opacity=0);
opacity: 0;
}
> .caption {
display: none;
position: absolute;
right: 0;
bottom: 0;
left: 0;
padding: 1rem;
background-color: rgba(0, 0, 0, 0.5);
background: linear-gradient(to top, rgba(0, 0, 0, 0.5), transparent);
color: white;
&.caption-visible {
display: initial;
}
}
}
> .jg-entry-visible {
filter: alpha(opacity=100);
opacity: 1;
background: none;
> img, > a > img, > svg, > a > svg {
filter: alpha(opacity=100);
opacity: 1;
-webkit-transition: opacity 500ms ease-in;
-moz-transition: opacity 500ms ease-in;
-o-transition: opacity 500ms ease-in;
transition: opacity 500ms ease-in;
}
}
> .jg-filtered {
display: none;
> .spinner {
position: absolute;
bottom: 0;
margin-left: -24px;
padding: 10px 0 10px 0;
left: 50%;
filter: alpha(opacity=100);
opacity: 1;
overflow: initial;
}
> span {
display: inline-block;
filter: alpha(opacity=0);
opacity: 0;
width: 8px;
height: 8px;
margin: 0 4px 0 4px;
background-color: #000;
border-radius: 6px;
}
}
}
|
2.2 在页面布局文件中引入
在主题的layout/base.pug文件中引入justifiedGallery.pug模板:
1
2
3
4
| #layout.pure-g
.pure-u-1.pure-u-md-3-4: .content_container
block content
include _partial/justifiedGallery.pug
|
2.3 在页脚脚本引入js文件
在主题的layout/_partial/footer.pug文件中引入justifiedGallery.pug模板,并添加justifiedGallery初始化代码:
1
2
3
4
5
| //- justifiedGallery
script(type='text/javascript', src=url_for(theme.js) + '/jquery.justifiedGallery.min.js')
script(type='text/javascript', src=url_for(theme.js) + '/maupassant.js')
//- 懒加载
script(type='text/javascript', src=url_for(theme.js) + '/lazyload.min.js')
|
三、使用
添加相册数据,在文章的front-matter中添加图片数据,其中第一个元素是为原图地址,第二个为缩略图地址,第三个为图片的描述。
1
2
3
4
| albums: [
["https://sm.ms/img/13399.jpg","https://sm.ms/img/13399.jpg","photo1"],
["https://sm.ms/img/13399.jpg","https://sm.ms/img/13399.jpg","photo2"]
]
|
发布时间: 2025-09-25 8:00:00
更新时间: 2025-09-25 16:32:37
本文链接: https://wyatt.ink/posts/uncategorized/40920642.html
版权声明: 本博客所有文章除特别声明外,均采用 CC BY-SA 4.0 协议 ,转载请注明出处!